Did you know, that DNS is literally the heart of the internet?
Almost everything you do on your internet-connected devices begins with a DNS query.
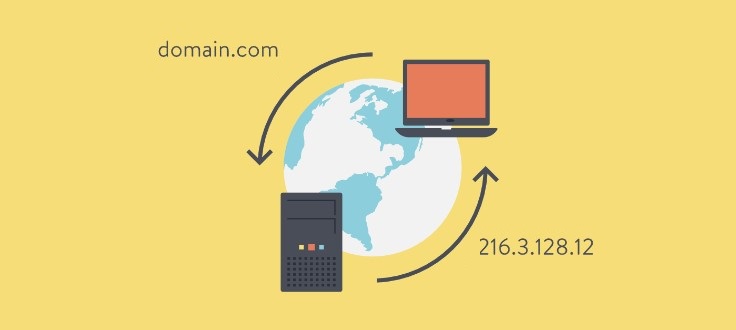
DNS works like a phone directory and helps you access any location you want on the web.
How so?
Let me explain. Without DNS in our daily lives, you would have to remember the IP address of the websites you want to visit. For example, when you want to visit the search engine GOOGLE, all you need to do is type google.com in the address bar of your web browser.
However, unfortunately, your web browser doesn’t know how to access the server hosting google.com. This is where DNS comes into play.
Your web browser requests a DNS server, which is usually operated by your internet service provider (ISP), and it converts the name google.com into an IP address, like 142.251.16.100
What is DNS in detail?
DNS stands for “Domain Name System,” a system used to translate domain names into their associated IP addresses and vice versa.
When you visit a website on the internet, your computer sends a request to a DNS server to obtain the IP address of the desired website. By using DNS, easily understandable text addresses are converted into digital IP addresses specific to the servers hosting those domains, allowing devices to connect to servers and access websites and services on the internet.
The problem is that the default DNS on our mobile or computer devices is not secure, meaning that all of your queries and requests to access websites are sent over the network in clear and easy-to-track, intercept, and spy on ways.
Why is this a problem?
Let’s assume you’re on a public network (like Wi-Fi in a café) and you start searching for different things on your Android device. For example, you need to access your banking account or any other website and don’t want anyone to know the address you’re typing.
If someone else on the same network has the necessary skills, they can intercept your search queries (or the URLs you visit) and know exactly what you’re looking for. This can be harmless, or it can be very dangerous. In any case, why take the risk? Therefore, the new DNS over TLS protocol was introduced. This protocol creates a secure channel between your web browser and the DNS server, protecting your DNS traffic from curious eyes and malicious third parties. DNS over HTTPS is another widely used protocol for DNS security.
Google introduced DNS over TLS support into the Android operating system through the Private DNS feature.
This feature is available in Android 9 (Pie) and newer versions, to encrypt all DNS traffic on the phone, including from applications.
This feature is enabled by default and a secure channel is used to connect to the DNS server if it supports it. However, if your internet service provider or mobile service provider does not support encrypted DNS, or if you’re simply unsure, you can use a third-party secure DNS server using the Private DNS feature.
Here’s how to enable, disable, or use Private DNS on an Android operating system for better SEO.
What is Private DNS?
Private DNS is a feature of the Domain Name System (DNS) that allows you to encrypt your DNS queries. In other words, Private DNS encrypts the web addresses you enter in your web browser or mobile apps to ensure that they are not monitored by anyone else on the same network.
Private DNS is essential for maintaining privacy and security when using public or untrusted Wi-Fi networks, as anyone on the network can view the web addresses you visit, and thereby gain access to your personal information.
Enabling Private DNS mode on an Android device requires some simple settings that can be found in the device’s settings menu.
How to enable Private DNS or DNS mode on Android? In fact, it’s very simple.
What are the requirements for enabling Private DNS mode on Android devices?
The only thing you need to activate Private DNS mode is an Android device running on version 9 or higher (released in 2018). Therefore, all modern smartphones running on the Android operating system can enable this feature.
Activating Private DNS mode on Android devices
Here’s how to enable Private DNS mode on Android devices.
How to enable private DNS mode on Android devices
Here are simple steps to enable private DNS mode on your Android device:
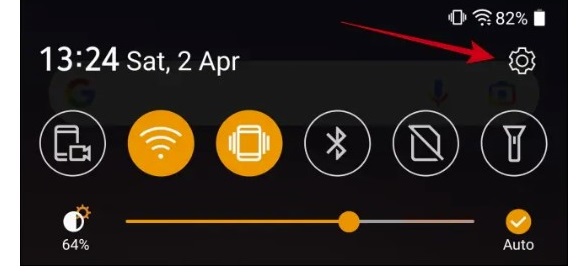
Open the Settings app on your Android device.

Look for the section “ Network and Internet“ and click on it. (You can simply search in the device settings on Private DNS due to the different locations in some devices)

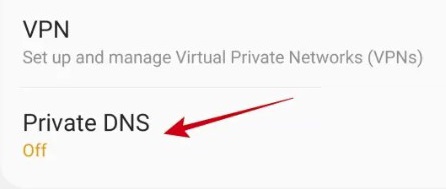
Choose “Private DNS” from the available options. If you don’t see the “Private DNS” option right away, you may have to click on “More Connection Settings” or “Advanced.”

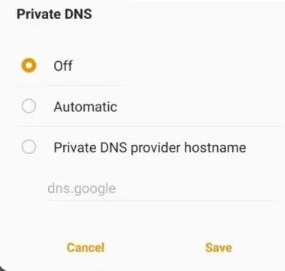
You will get three options: Off, Automatic, and Private DNS hostname.
You can select “Off” to stop using DNS over TLS, “Auto” to use encrypted DNS when available, or type the hostname of a private DNS provider to use encrypted DNS from that provider. Remember that instead of DNS server IP addresses, you need a hostname. (Ex: dns.google).

Once done, hit “save” to apply the changes.
It should be noted that the “Private DNS” option may differ on some smartphones, but it should be available on most modern Android phones.
Some free Private DNS hostname you can use:
Google DNS
dns.google
Quad9
dns.quad9.net
Cloudflare
1dot1dot1dot1.cloudflare-dns.com
DNS Cleanbrowsing
security-filter-dns.cleanbrowsing.org
Open DNS
208.67.222.222
NextDNS
45.90.28.0
Comodo Secure
8.26.56.26
OpenNIC
192.95.54.3
Note: Although all the mentioned free DNS services are worth trying, I recommend using Cloudflare (1dot1dot1dot1.cloudflare-dns.com). I believe it is the fastest and most secure among them all.
Why you might want to use a private DNS provider:
As mentioned above, the Private DNS feature in the Android operating system brings DNS over TLS support to the platform. Unfortunately, while the “Automatic” option uses secure DNS when available, you are at the mercy of your internet service provider or mobile phone service provider to provide encrypted DNS support. Your internet service provider may not want to do this.
But there is an easy way to check. You can check if your internet service provider supports the TLS protocol for encrypting DNS using the privacy test for the browser owned by Tenta, a subsidiary of Avast. It shows whether DNS at your internet service provider is enabled for TLS or not. (Click here to take the test)
If you want to make sure that DNS queries on your phone remain secure and encrypted, we recommend using Google Public DNS or Cloudflare.
