
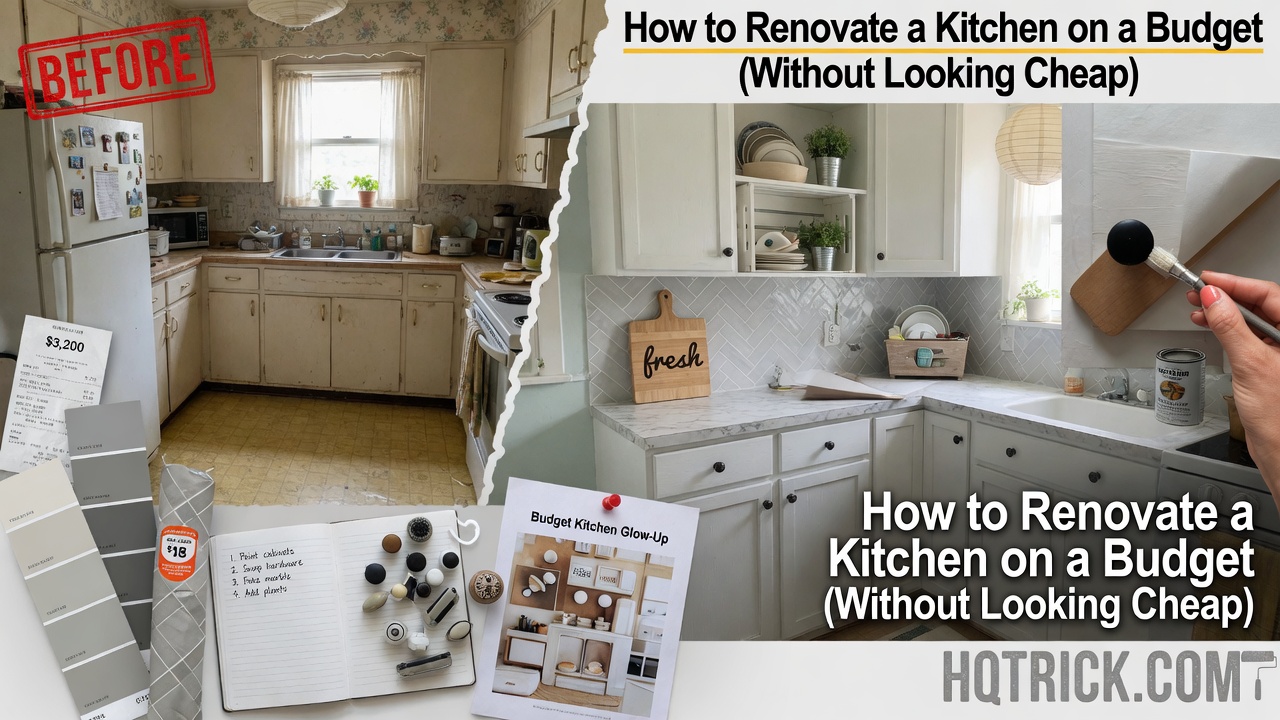
A budget kitchen renovation works best when you stop asking:
“How cheaply can I replace everything?”
and start asking:
“What can I keep, what genuinely needs fixing, and which few changes will make the biggest difference?”
Replacing cabinets, countertops, flooring, plumbing, lighting and appliances all at once is how a kitchen refresh turns into a major remodel.
But many kitchens do not actually need that.
If the layout works, the cabinets are structurally sound and the plumbing and electrical systems are safe, you can often create a dramatically better kitchen by upgrading only the parts you see and use most.
The trick is spending money in the right order.
HQ Quick Trick: The cheapest kitchen renovation is usually the one that keeps the existing layout. Moving sinks, gas lines, electrical circuits and major appliances can turn cosmetic work into construction very quickly.
First Decide: Does Your Kitchen Need a Refresh or a Remodel?
This decision should happen before you choose a paint color or countertop.
A refresh improves the kitchen you already have.
That can include cabinet paint, new hardware, lighting, backsplash, faucet, wall paint or selective appliance replacement.
A remodel changes how the kitchen functions.
That can involve moving plumbing, removing walls, relocating appliances, changing electrical circuits or replacing cabinetry completely.
If the layout is already functional, preserving it is one of the strongest budget decisions you can make.
But cosmetic work should never hide an actual problem.
Before spending on appearance, check for water damage, leaking plumbing, unsafe wiring, damaged cabinets, mold, failing flooring or other issues that need repair first.
Our complete home improvement guide for beginners explains the same principle across the whole house: protect the structure and systems before spending money on appearance.
Use the Kitchen Budget Priority Test
For every planned upgrade, ask two questions:
How much will this improve daily use?
and:
How much will this improve what I see every day?
The best budget renovations usually target things that score highly on one or both.
| Upgrade | Visual impact | Functional impact | Budget priority |
|---|---|---|---|
| Fixing leaks or damage | Low initially | Very high | Essential |
| Cabinet paint or refinishing | Very high | Medium | High |
| Hardware | High | Medium | High |
| Lighting | High | High | High |
| Wall paint | High | Low | High |
| Faucet | Medium | High | Medium-high |
| Backsplash | High | Low-medium | Medium |
| Countertops | Very high | High | Depends on condition |
| New cabinet boxes | Very high | High | Expensive |
| Moving plumbing | Low visually | Depends | Avoid unless necessary |
| Moving walls | Variable | Potentially high | Major remodel |
This prevents a common mistake: spending most of the budget on one expensive feature while leaving several obvious problems untouched.
Keep the Layout Whenever Possible
Moving a refrigerator a few feet sounds simple.
It may not be.
Relocating major kitchen elements can affect:
- Electrical outlets and circuits
- Plumbing
- Drainage
- Gas connections
- Ventilation
- Cabinet dimensions
- Flooring
- Walls
If the current work triangle and circulation are reasonably functional, consider designing around them.
You can make an old kitchen feel dramatically different without moving the sink or stove.
This is one of the biggest differences between a budget renovation and a full remodel.
Inspect the Cabinets Before Replacing Them
Cabinets can consume a huge portion of a renovation budget, so do not replace them just because the doors look dated.
Open every cabinet and inspect the boxes.
Look for water damage, swelling, broken joints, sagging shelves and structural deterioration.
If the boxes are solid, you have several cheaper options.
Paint the Existing Cabinets
Painting can completely change the room while keeping the existing cabinetry.
The quality of the result depends more on preparation than on the final coat.
Clean grease thoroughly.
Remove doors and hardware.
Label everything.
Repair damage.
Sand or prepare the surface appropriately.
Use products intended for cabinetry and follow their curing instructions.
Trying to save several hours on preparation is one of the fastest ways to end up with a finish that looks cheap.
Replace Only Doors and Drawer Fronts
If the cabinet boxes are good but the door style is badly dated or damaged, replacing the visible fronts can make more sense than replacing the entire cabinet system.
This keeps the expensive structural part while changing most of what you actually see.
Change the Hardware
Hardware is a small upgrade that can have an outsized effect because every cabinet door and drawer repeats the change across the entire room.
Before buying new pulls, measure the existing hole spacing.
Matching the current holes can save you from filling and redrilling every door.
Do Not Choose Cabinet Color in Isolation
Cabinets occupy a large visual area, so their color needs to work with:
- Countertops
- Flooring
- Backsplash
- Appliances
- Wall color
- Natural light
Do not select a cabinet color from a small sample under store lighting and assume it will behave the same way in your kitchen.
Test it in the actual room and look at it at different times of day.
Our guide to choosing paint colors for every room explains how undertones and changing light can make a color look completely different once it reaches your walls.
Lighting Can Make a Cheap Kitchen Look Better—or an Expensive One Look Worse
Lighting is one of the highest-value areas to improve.
Many kitchens rely on one bright ceiling fixture.
That gives you light, but not necessarily good light.
A better kitchen usually has layers.
General Lighting
This lights the entire room.
Task Lighting
This helps you see where you prepare food.
Under-cabinet lighting is particularly useful because upper cabinets often cast shadows exactly where you need visibility.
Accent Lighting
Pendants or other decorative fixtures can help visually define an island, peninsula or dining area.
You do not need all three layers to renovate successfully.
But fixing poor task lighting often improves both how the kitchen looks and how it works.
Plug-in or appropriately designed low-voltage options can make some lighting upgrades relatively straightforward.
New electrical circuits or wiring changes should be handled according to local electrical requirements and by a qualified professional when required.
Paint the Walls Before Replacing Expensive Surfaces
Wall paint is inexpensive relative to almost every major kitchen component.
It also changes how the existing cabinets, counters and floors look because those surfaces are always seen against the walls.
If you are unsure whether your kitchen truly needs major replacement work, paint first.
You may discover that what felt like an old kitchen was partly an old color scheme.
For kitchens, choose a finish suitable for a frequently cleaned area and follow the manufacturer’s recommendation for the surface and environment.
The exact sheen matters less than using a product that can tolerate normal kitchen cleaning.
Replace the Backsplash Strategically
A backsplash sits directly in the visual center of many kitchens.
That makes it a strong candidate for a budget refresh.
But do not assume it needs to become the focal point.
If your counters already have a busy pattern, a simple backsplash often works better.
If your countertops are visually quiet, the backsplash can carry more character.
Traditional tile can be a practical DIY project for someone patient enough to measure, cut and finish carefully.
Peel-and-stick products can also work in the right application, particularly for a temporary or low-cost refresh, but check the manufacturer’s suitability for heat, moisture and the specific wall surface.
The detail that often separates a polished result from an obviously DIY result is not the tile itself.
It is the edges.
Plan corners, exposed ends, outlets and transitions before installing the first piece.
Do Not Replace Countertops Automatically
Countertops have enormous visual impact, but they can also absorb a large share of the budget.
Before replacing yours, ask whether they are:
Damaged or simply dated?
A structurally sound but unfashionable countertop may become much less noticeable after you update the cabinets, hardware, lighting and backsplash.
That is why countertops should not always be the first renovation decision.
Make the less expensive changes first, then look at the room again.
If replacement is still necessary, compare materials based on:
- Durability
- Heat resistance
- Stain resistance
- Maintenance
- Repairability
- Installation requirements
- How you actually use the kitchen
Do not choose only from a photograph.
A material that looks beautiful but requires maintenance you know you will not perform is not a good budget purchase.
Replace Appliances Because They Need Replacing
A budget renovation does not automatically require a matching suite of new appliances.
If the refrigerator works reliably, the oven performs properly and the dishwasher is doing its job, replacing all three for appearance alone can consume money that produces more value elsewhere.
Replace appliances when they are:
- Failing
- Inefficient enough to justify replacement
- Creating functional problems
- No longer suitable for your needs
If you are already planning broader efficiency improvements around the house, our guide to energy-saving home upgrades can help you decide where efficiency spending is more likely to produce practical value.
The Faucet Is a Small Upgrade You Use Constantly
Some renovations improve appearance.
A faucet improves appearance and affects something you use repeatedly every day.
That makes it a good candidate when the existing faucet is:
- Leaking
- Difficult to use
- Poorly sized for the sink
- Corroded
- Functionally outdated
If you replace it yourself, understand your shutoff valves first.
Know where the main water shutoff is before beginning any plumbing work.
And test every connection carefully for leaks after installation.
Our guide to fixing common home problems yourself covers the broader principle of knowing when a small DIY fix is reasonable and when a problem should be handed to a professional.
Flooring: Do Not Create a New Problem to Solve an Old One
Kitchen flooring needs to tolerate:
- Frequent cleaning
- Spills
- Foot traffic
- Chairs
- Dropped objects
Do not choose flooring entirely because it is inexpensive or currently fashionable.
Also consider how a new floor interacts with existing cabinets and appliances.
Installing a floor around permanent cabinets can be very different from installing flooring during a complete remodel.
If the existing floor is safe, intact and visually acceptable after the other changes, keeping it may be the smartest budget choice.
You do not earn extra renovation points for replacing something that still works.
Decide What to DIY Before You Buy Materials
Do not purchase an entire project’s materials and only then decide whether you have the skill to install them.
Divide the renovation into three groups.
| Usually approachable for careful DIYers | Depends heavily on skill | Usually professional territory |
|---|---|---|
| Painting walls | Cabinet refinishing | Gas-line changes |
| Changing cabinet hardware | Tile backsplash | New electrical circuits |
| Organizing and decluttering | Faucet replacement | Structural wall changes |
| Some plug-in lighting | Flooring | Major plumbing relocation |
| Simple cosmetic repairs | Cabinet installation | Complex code-regulated work |
Your experience, local regulations and the exact house matter.
If a mistake could cause fire, flooding, structural damage or gas leakage, the amount saved by DIY can disappear extremely quickly.
If you are gradually building your own tool kit, our cordless tools guide for DIY home improvement can help you avoid buying an entire tool ecosystem before you know which tools your projects actually require.
Budget by Percentage, Not by Internet Price Lists
Fixed renovation prices age quickly and vary enormously by country, city, house and material.
A more Evergreen approach is to allocate the money you actually have.
For a cosmetic renovation, you might divide your budget into broad buckets:
| Budget area | Example share |
|---|---|
| Repairs and preparation | 15% |
| Cabinets / paint / fronts | 25% |
| Lighting and hardware | 15% |
| Backsplash or surface upgrades | 15% |
| Faucet / small fixtures | 10% |
| Finishing details | 5% |
| Contingency | 15% |
This is not a universal formula.
Its purpose is to stop you from spending 90% of your money before discovering the leaking valve, damaged wall or installation material you forgot to include.
A contingency is not wasted budget.
It is part of the project.
Use a Stop Point
One of the most useful budget-renovation techniques is deciding in advance where you will stop.
For example:
Phase 1: repairs, paint and hardware.
Look at the result.
If the kitchen now feels good enough, stop.
If it still needs work:
Phase 2: lighting and backsplash.
Look again.
Only then consider:
Phase 3: countertop or cabinet-front replacement.
This prevents one cosmetic decision from triggering five additional purchases.
Renovation has a chain-reaction problem.
New counters make the backsplash look old.
New backsplash makes the cabinets look dated.
New cabinets make the flooring look wrong.
A stop point protects the budget.
Avoid Trend Chasing
A budget renovation should ideally last longer than the trend that inspired it.
That does not mean everything has to be white or neutral.
It means distinguishing between expensive and inexpensive places to experiment.
Use long-lasting choices for:
- Cabinets
- Countertops
- Flooring
Experiment more freely with things that are cheaper to change:
- Wall paint
- Hardware
- Art
- Accessories
- Some lighting
- Textiles
If the current social-media color disappears from design feeds next year, repainting one wall is easier than replacing an entire countertop.
Make the Kitchen Look Better for Free Before Buying Anything
Remove everything from the countertops.
Clean the room thoroughly.
Then put back only items you genuinely use or intentionally want to display.
This does three things.
First, it shows you what the room really looks like.
Second, it can make a small kitchen feel larger.
Third, it prevents you from renovating around clutter.
You may also discover that some storage problems are really organization problems rather than cabinetry problems.
Do this before measuring for new cabinets.
Think About Storage Before Adding Storage
More cabinetry is not automatically better.
Start by asking why the current storage fails.
Perhaps:
- Shelves are poorly spaced
- Deep cabinets hide everything
- Pots are difficult to reach
- Food and cookware are mixed randomly
- Items used daily are stored too far from the work area
Simple internal organizers can sometimes solve these problems without adding a single cabinet.
Place frequently used items close to where you use them.
Store less-used equipment farther away.
A kitchen should be organized around movement, not around fitting the maximum possible number of objects into cupboards.
Do Not Renovate Around Things You Never Use
Kitchen renovation is a good time to question appliances and features that consume valuable space.
If a large appliance has not been used in a year, decide whether it deserves permanent countertop or cabinet space.
The same goes for special-purpose cookware and gadgets.
A cleaner kitchen can feel more renovated simply because its best surfaces are visible again.
Measure Everything Twice
Budget mistakes often come from measurements rather than design.
Before ordering:
- Cabinet doors
- Hardware
- Appliances
- Countertops
- Sink
- Backsplash
- Flooring
- Lighting
verify the dimensions again.
For appliances, check more than width.
Door swing, ventilation clearances, depth and connection locations can all matter.
For hardware, check center-to-center screw spacing.
For faucets, check the sink configuration.
The cheapest wrong-size product is still wasted money.
Create a Sample Board Before Committing
You do not need professional design software.
Put physical samples together.
Include:
- Cabinet color
- Countertop sample
- Backsplash
- Hardware finish
- Wall paint
- Flooring if changing it
Look at them together inside the actual kitchen.
Something that looks excellent alone can conflict badly with another material because of undertones, texture or finish.
This small step can prevent expensive mismatches.
A Better Order for a Budget Kitchen Renovation
For most cosmetic renovations, a sensible sequence is:
- Diagnose repairs and safety problems.
- Set the maximum budget and contingency.
- Decide what stays.
- Finalize colors and materials.
- Order long-lead items.
- Repair walls or damaged surfaces.
- Paint or refinish cabinets.
- Paint walls.
- Install backsplash where planned.
- Install fixtures, hardware and lighting.
- Complete countertop work if included.
- Finish trim and touch-ups.
- Organize and declutter.
- Inspect everything for leaks, loose hardware or unfinished details.
The exact order changes with the project.
The key principle is avoiding repeated work.
You do not want to paint a wall and then cut it open for electrical work the following week.
When to Hire a Professional
A budget renovation does not mean performing every job yourself.
Bring in qualified help when the work involves areas such as:
- Gas
- New electrical circuits
- Structural alterations
- Major plumbing relocation
- Work requiring permits or licensed trades in your area
You may also choose professional help simply because the cost of a poor DIY result would exceed the labor saving.
Stone countertop fabrication is an obvious example.
There is nothing wrong with combining DIY cosmetic work with professional technical work.
In fact, that is often one of the most effective ways to control a renovation budget.
Get Comparable Quotes
If hiring contractors, do not compare a one-line price from one company with a detailed scope from another.
Ask each contractor to specify:
- Work included
- Materials included
- Work excluded
- Who obtains permits
- Cleanup
- Disposal
- Payment schedule
- Estimated project sequence
The cheapest headline price may simply leave more expenses outside the quote.
Compare scope against scope.
Do Not Spend the Contingency Before the Project Starts
Keep part of your budget untouched.
Older kitchens have a habit of revealing surprises once work begins.
You might discover:
- Water damage
- Uneven walls
- Deteriorated plumbing fittings
- Additional preparation work
- Incorrect previous repairs
If nothing unexpected happens, excellent.
You can use the remaining money at the end.
But treating contingency money as decoration money on day one defeats its purpose.
Renovate for Your Actual Life
Do not design a kitchen for the imaginary person you plan to become.
If you never bake, you may not need a dedicated baking station.
If you rarely entertain, you may not need seating for six around an island.
If you cook every evening, task lighting and practical work surfaces may matter more than decorative shelving.
If two people regularly cook together, circulation may be more important than squeezing in another cabinet.
The best kitchen is not the one that photographs best.
It is the one that removes friction from the things you actually do there.
How a Kitchen Fits Into the Rest of Your Home
A kitchen renovation should not consume money needed for more urgent house problems.
Before starting cosmetic work, compare it with the rest of your maintenance list.
A leaking roof, unsafe electrical system or active plumbing problem should generally take priority over a new backsplash.
The complete home improvement guide gives you a framework for prioritizing projects across the entire property.
If your kitchen is only the first room you are updating, our budget bathroom renovation guide applies the same “keep the expensive infrastructure whenever possible” principle to bathrooms.
Frequently Asked Questions
How can I renovate a kitchen cheaply?
Keep the existing layout and structurally sound components wherever possible.
Start with repairs, paint, cabinet refinishing, hardware and lighting before replacing expensive elements such as cabinets and countertops.
What is the cheapest way to update kitchen cabinets?
If the cabinet boxes are in good condition, painting, changing hardware or replacing only doors and drawer fronts can cost substantially less than replacing the entire cabinet system.
What should I replace first in an old kitchen?
Fix active problems first, particularly leaks, water damage, unsafe electrical work or deteriorated materials.
For a cosmetic refresh, paint, lighting and cabinet hardware can provide large visual improvements without requiring major construction.
Should I replace cabinets or countertops first?
Decide whether the cabinets are structurally sound before ordering either.
Countertop measurements often depend on the final cabinet configuration, so cabinet decisions should generally be resolved before new countertops are fabricated.
Is a kitchen backsplash a good DIY project?
It can be for a careful beginner, particularly on a simple, flat area.
Accurate layout, cutting and edge finishing are what usually determine whether the result looks professional.
Can I renovate a kitchen in stages?
Yes, and staging the project can be one of the best ways to protect your budget.
Complete high-impact low-cost changes first, assess the result, and continue only where the kitchen still genuinely needs improvement.
What kitchen work should not be DIY?
Work involving gas, structural changes, major plumbing relocation, new electrical circuits or other regulated work should be handled according to local codes and licensing requirements.
Does a budget kitchen renovation need new appliances?
No.
If existing appliances are safe, reliable and appropriate for your needs, keeping them can preserve a large portion of the renovation budget for areas that actually need improvement.
Final Verdict
Learning how to renovate a kitchen on a budget is mostly about knowing what not to replace.
Keep a functional layout.
Keep structurally sound cabinets.
Keep working appliances when replacement adds little value.
Spend first on repairs and preparation.
Then prioritize the changes that affect what you see and use every day:
Cabinet finish.
Lighting.
Hardware.
Paint.
Organization.
After those changes, reassess the kitchen before committing to expensive countertops, new cabinetry or layout work.
If you are planning improvements throughout the house, start with our complete home improvement guide, then use the budget bathroom renovation guide for the next major room.
For the cosmetic side, the paint color guide will help you avoid expensive color mistakes, while our cordless DIY tools guide can help you build a tool kit gradually instead of buying equipment you may never use.
The HQTrick rule: spend money changing what is broken or what makes a meaningful difference—not simply everything that happens to be old.